How to master your camera settings
Finding the time to be creative is one of the best things you can do in your life. In this article, I will try to explain you every nook and cranny of your camera so you can start photographing jewelry, products, immediately.
Arrange your photography scene
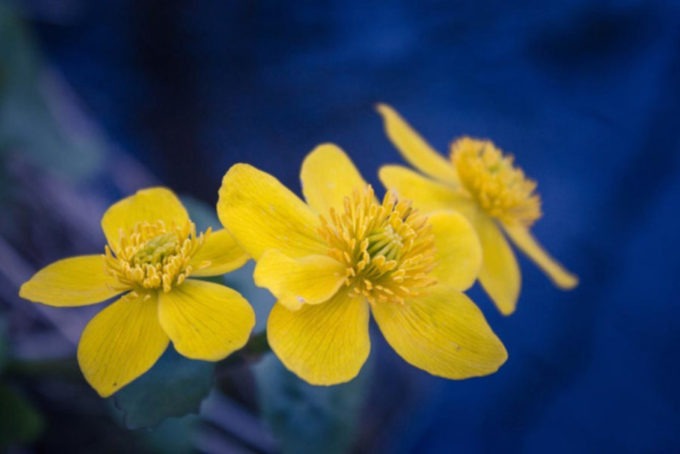
First, you need to decide what will you photograph. You can photograph any subjects you like for example jewelry, products, flowers, fruit. The techniques used will be almost the same. For the background use a large piece of white paper or a curved nontransparent plexi white glass. First, we need to create a gentle curve in the backdrop. Stick the top of the paper to a wall behind the subject and the bottom to the table. Be sure that your shooting beside the window to get enough light for your subject.
Use the shallow depth of field
One of the best tools, you can use in photography is the aperture. With aperture, you can control how much of the image is going to be in the focus. To get that classic result we want to use a wide aperture. This means that only front part of the image is going to be in
the focus the rest is going to be a little bit blurred. To get this resolved set the camera modes to aperture priority and use the widest aperture available
in your camera. Because you’re in aperture priority mode the camera will automatically fix shutter speed.
Because you are shooting inside, the light levels will be lower than if you were shooting outside. This means that the shutter speed will fall below 1/60 sec. This can cause a visible blur in the picture which is the result of camera shake. The shutter speed is slow enough to capture every shake of the camera that you make. To avoid this you have to use the tripod. With tripod, you can shoot images with lower shutter speed and still get great results.
How to use the right camera settings
Here are the most important camera settings that you need to be aware of.
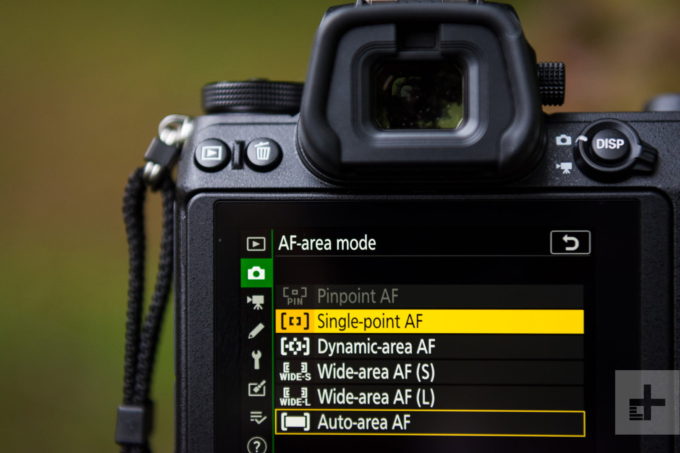
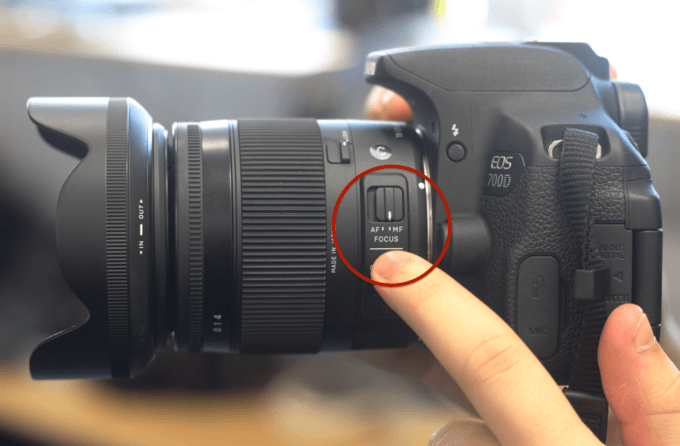
Single point autofocus
Single point autofocus allows you to choose the focal point in your subject
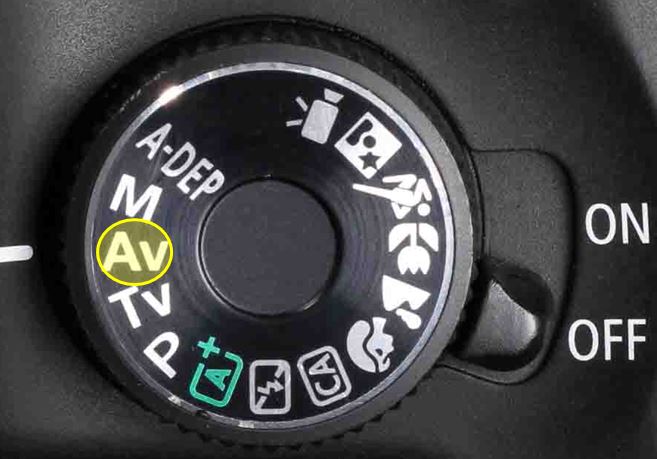
Aperture priority
Aperture priority setting allows you to control your aperture of the camera
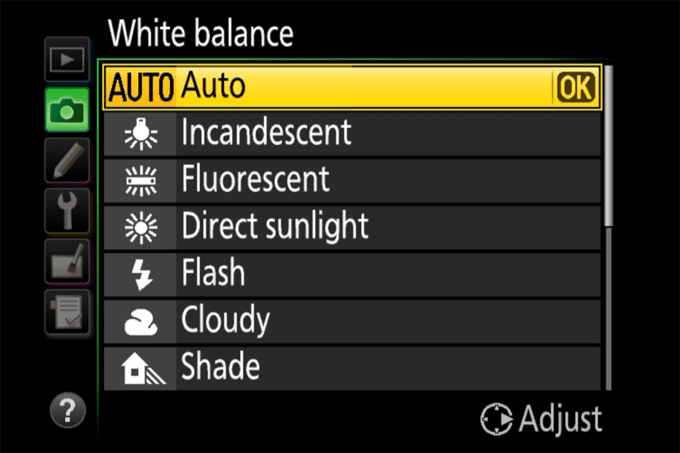
White balance
White balance automatically sets the white balance in your shots so the image and the colors will look realistic
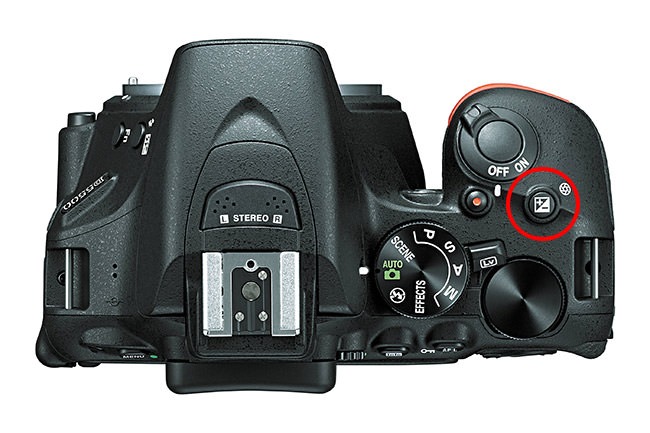
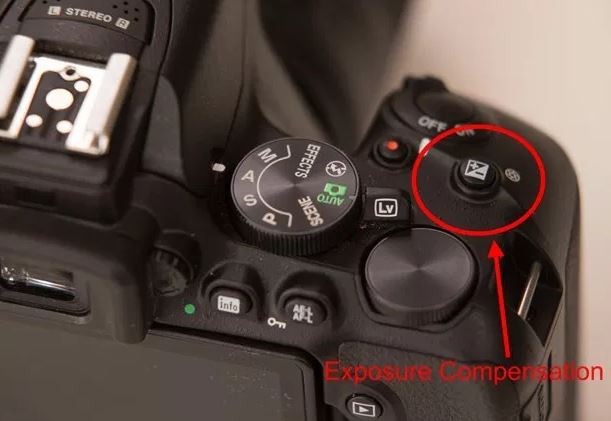
Exposure compensation
Exposure compensation helps you raise or lower exposure which means basically lightning or darkening the scene.
This can be very useful when you would want to have a brighter or darker image.
How to choose your perfect lens
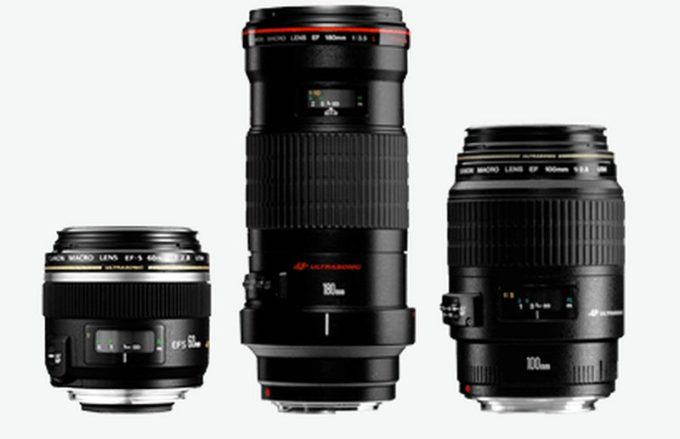
Now that you have hundreds of different lenses to choose. For most occasions, we suggest to use something like 18 to 55 mm f/2.8 lens that usually comes with the camera. To avoid any distortion that can come from wider focal lengths you should set the local length to around 40 mm.
Also consider using 35mm f/1.4 lens which allows you to capture the beautiful depth of field in your images, perfect for shooting nature, models when you want your background to be blurred out.
Also try 50 mm lens that we personally use many times in model photography.
The 100mm macro lens is the standard when shooting the jewelry when you want to get really close to the subject and capture every small detail of the jewelry.
Setting the right amount of exposure
When you shoot in aperture priority mode that was suggested before sometimes the exposure will be too dark or too bright.
You can manually adjust by clicking the +/ – button on your camera. If you shoot in raw mode you can later adjust exposure in Photoshop or Lightroom.
How to super tune your composition
In this chapter we will talk about the subject that should be positioned in the center of your frame. Central compositions are universally accepted. We don’t want to have half of your image filled with the shooting subject and the half empty. Leaving big empty spaces in your image is a big no-no in photography. If you leave big empty spaces in the image that means you’re not making the most of the available space.
Very important is the rule of odds in photography to get cash a symmetrical image. Avoid creating unbalanced compositions or empty compositions.
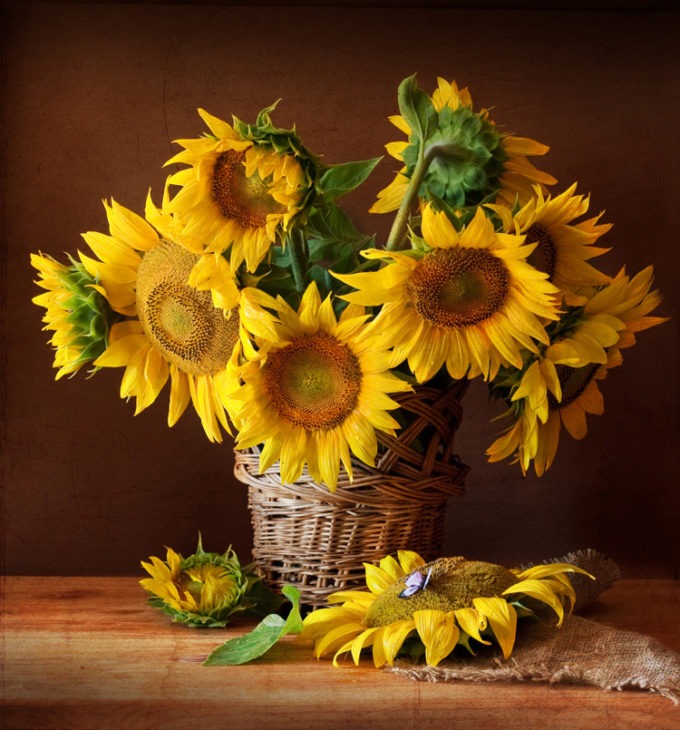
Creating the timeless still life is as hard as perfecting your camera settings. The most important is to properly place your shooting subject. You need to ensure that your subjects are basking in soft side lighting. This means that the subject and yourself should be in a position that is perpendicular to the window. Side lightning creates a fantastic effect on the subject. It is especially powerful for still life photos. To create an extra effect in your image place a black card opposite to the window with the subject in between. This will flag the light and gives the image more depth to the shadows.
Place your main subject in the center of the photo. Add small items around the subject so you will not have empty spaces in your image. These can be small fruit, flowers or anything else that goes along with your team. When you should jewelry you can use pieces of wood, rose petals etc.
The rule of odds is very important in creating perfect shots. It means that the odd numbers of subjects are more pleasing to the eye than even numbers of subjects. So be careful not to have an even number of key subjects in your photo. You don’t have to count every tiny small subject in your photo, but pay attention to the number of larger subjects in your frame and be sure you get the odd number.
Always clean your background. That means removing any clutter, dirt, subjects that distract the viewer of the photo from the main subject. Ensure that the background is clean and of neutral color, for example, colors like white, gray or black are perfect for backgrounds. Also, be careful when shooting not to capture the edge of the backdrop. Later on you don’t have to crop the image. Be sure that the backdrop is wide enough to cover the whole background of the image.
How to get a perfectly accurate focus in your shots
While we shoot in wide aperture mode we get the beautifully shallow depth of field. That means that the part of the image will be blurred out. The zone of sharpness, which is the amount of your photo that would be sharp, is strongly reduced when working in wide aperture mode. That is why creating a perfect focus is very important.
To create a perfect focused image you should set the camera focus setting to a single point AF mode. This means that you will have only one focus point instead of multiple AF points. Don’t leave your camera in auto area AF because you will have no control over where the camera will focus. Instead, the camera will focus on its own and this may not be where you would choose to place the focus.
Position your focus point over the object that is closest to the camera in the center of your frame. This in combination with shallow depth of field will give you the best results.
Give you images strong impact in editing
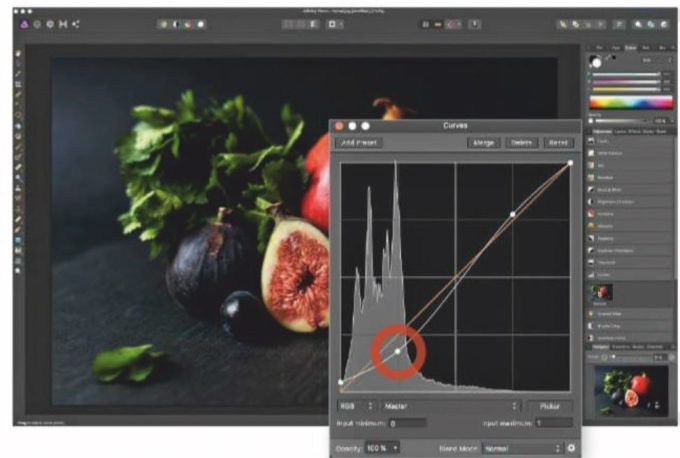
Now we have a perfect shot and it’s time to edit it. In Photoshop one of the most powerful tool is curves. With curves you can control the shadow, mid tones and highlights of the image.
With curves, you’re controlling the contrast of your final image which will increase the impact it has on your audience. It takes only a few seconds to get better contrast with curves inside Photoshop. You can also use other tools like sharpening, exposure, color balance etc.
When you’re adding a contrast with curves the image still needs to look natural. Don’t go overboard with curves settings. The image straight out of camera usually looks a little bit flat. With curves you’re able to darken the shadows and slightly increase the highlights that gives an image an extra punch.
In Photoshop open the image, create a new layer, and at the curves effect your image. Creating 2 extra anchor points in your curves you’re able to create a traditional S curve. Drag downwards on the left anchor a little bit, and upwards on the right ankle to produce a gentle S curve. At the end go to the left bottom corner and pulled the black point up slightly to create slightly faded look in the shadows further enhancing the details.
Why is photographing still life so important
When you take pictures of still life you learn so much about lighting. Still life gives you the freedom to analyze the space for the perfect spot before setting up your shot and to try different lighting and techniques before deciding which one is the best.
You have full flexibility of moving the subjects in and out of the frame, experimenting with composition, color matching, and the same time you’re training your eye to identify what looks good and whatnot.
I personally prefer a good table set up. Every good picture tells a great story. I adore the busy and messy table where I can place fresh flowers, old vintage elements, glassware, food. You have unlimited possibilities. I usually combine flowers with food and tableware to get that extra punch, that extra sense of place which creates a narrative that ties a series of images together with a storyline.
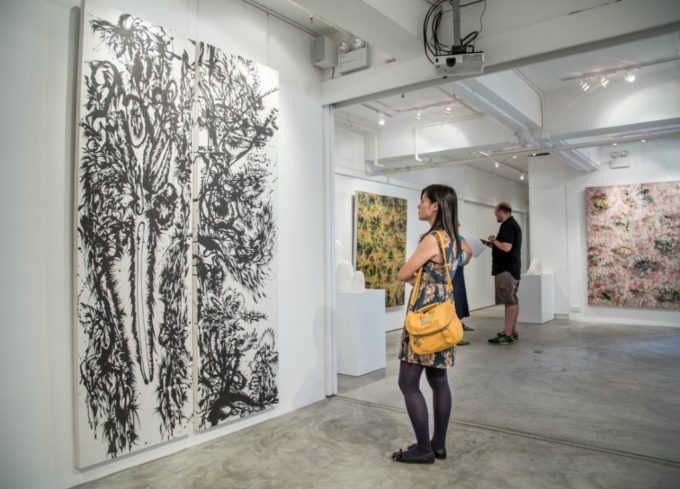
Many times I find my inspiration from paintings. When I visit museums and art expos I am to get new ideas for my photos. I’m also able to train my eye to see what looks good and what does not. I pay close attention to all the creative paintings and the stories behind them. I observe the lightning the colors, the composition of the paintings. I create a list of what I like and whatnot and put it in my notes on my mobile phone. Later when I am shooting my composition I go to the latest and try to implement it the ideas in my shots.